- Home
- Scotland's changing climate
- Urban Housing in Scotland
- Maintenance
- Ventilation
- Airtightness
- Insulation
- Lofts - insulation at ceiling level
- Lofts - insulation at rafter level
- Cavity wall insulation
- Solid Walls: Internal vs External Insulation
- Internal Solid Wall Insulation (IWI)
- External Solid Wall Insulation (EWI)
- Timber frame retrofit
- Windows and doors
- Openings in 'historical' buildings
- Openings in 'non-historical' buildings
- Ground floors
- Suspended floors
- Suspended floors - from below
- Suspended floors - from above
- Solid floors
- Insulation materials
- Building science
- Space heating
- Solar energy
- Product Selector
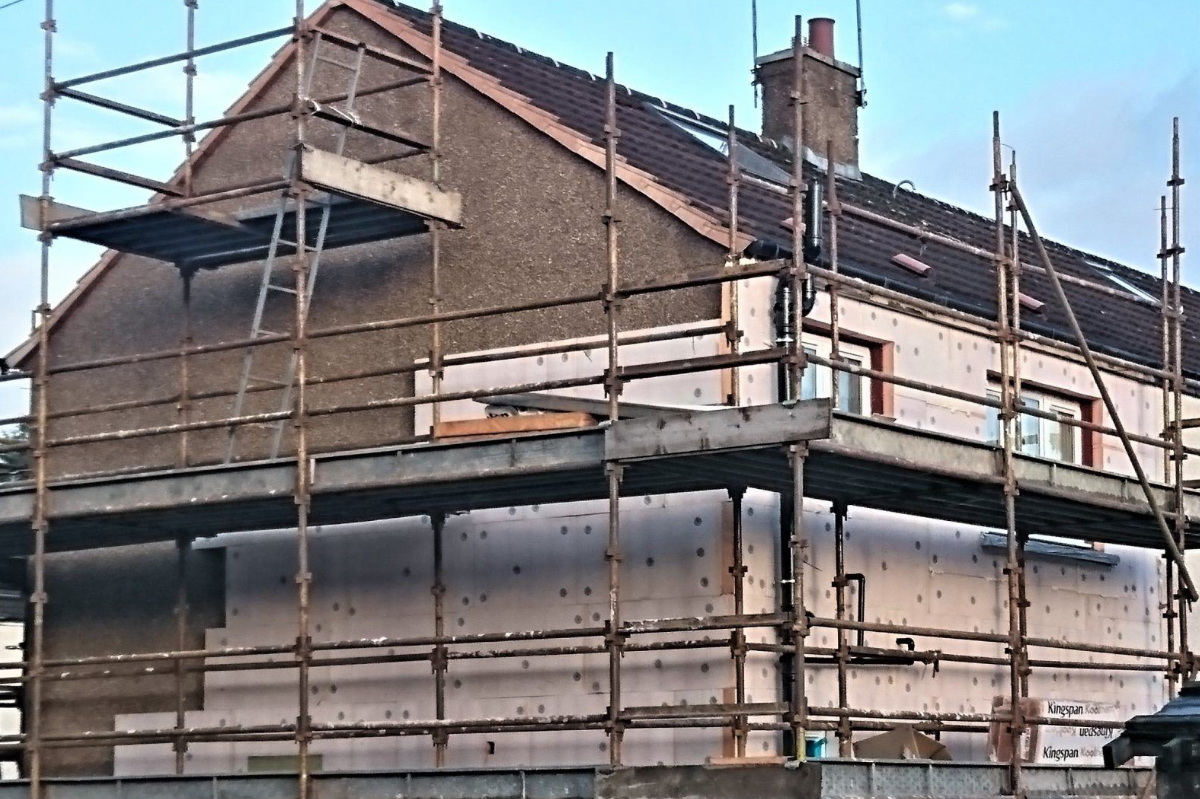
External Solid Wall Insulation (EWI)
Important to know
• To achieve a continuous layer of insulation, it may be necessary to undertake a lot of preparatory work, some of which may involve utility companies, which can be difficult to coordinate.
• It is critical that the insulation used is vapour permeable so that moisture can safely escape from the construction to the outside.
Source: Edinhome
Topic | Conventional Guidance | Our Guidance |
|---|---|---|
ENERGY | Various products and finishes to give an acceptable U-value | U-value is less important than continuity of insulation. No gaps - resulting in removal/replacement of common items like downpipes/gas meters / wallhead etc. Protected drywall reduces heat loss. Thermal mass of original wall available. Natural insulation reduces embodied energy. |
HEALTH | - | Effective insulation reduces cold spots and mould risk internally & improves comfort. |
FABRIC | - | Protecting the wall from weather safeguards longevity. Measures noted for Energy, Health, Maintenance and Moisture will protect building fabric from long-term problems. |
MODELLING | - | As Energy above – emphasis on little details in practice. |
FABRIC | - | As Energy above. |
MOISTURE | - | Far less risk of interstitial condensation. Vapour permeable and hygroscopic insulation helps protect the construction from saturation. |
PEOPLE | - | - |
CONSTRUCTION | - | Using vapour permeable insulation |
MAINTENANCE | (Installation of EWI reduces the need for maintenance of the original wall.) | Emphasis on ensuring all making good and maintenance carried out first. |
SIGNIFICANCE | Not acceptable for listed buildings, Conservation Areas, and some ‘finer’ properties where agreed. | As conventional guidance, greater importance is attached to existing external features: either avoid EWI or additional effort/cost to replicate details faithfully. |
Our guidance differs from conventional guidance in that we suggest taking far more trouble to achieve a continuous layer of insulation, mainly related to the level of preparatory works noted below.
Preparation
Review utilities and services
The first thing is to review the utilities and services entering the building. In many cases, these will enter the building underground, rising in a services cupboard, for example, which is fine. The issue arises where services enter through the wall, travel along the wall on the outside, or, as is often the case with gas meters, enter via a meter and box affixed to the wall.
Since the objective is to avoid any breaks in the insulation, any items which could penetrate the insulation need to be re-routed, or in the worst case, penetrate the insulation at a single point only, the best solutions involve re-routing so that the cable or pipework enters the building underground, but this may not be possible.
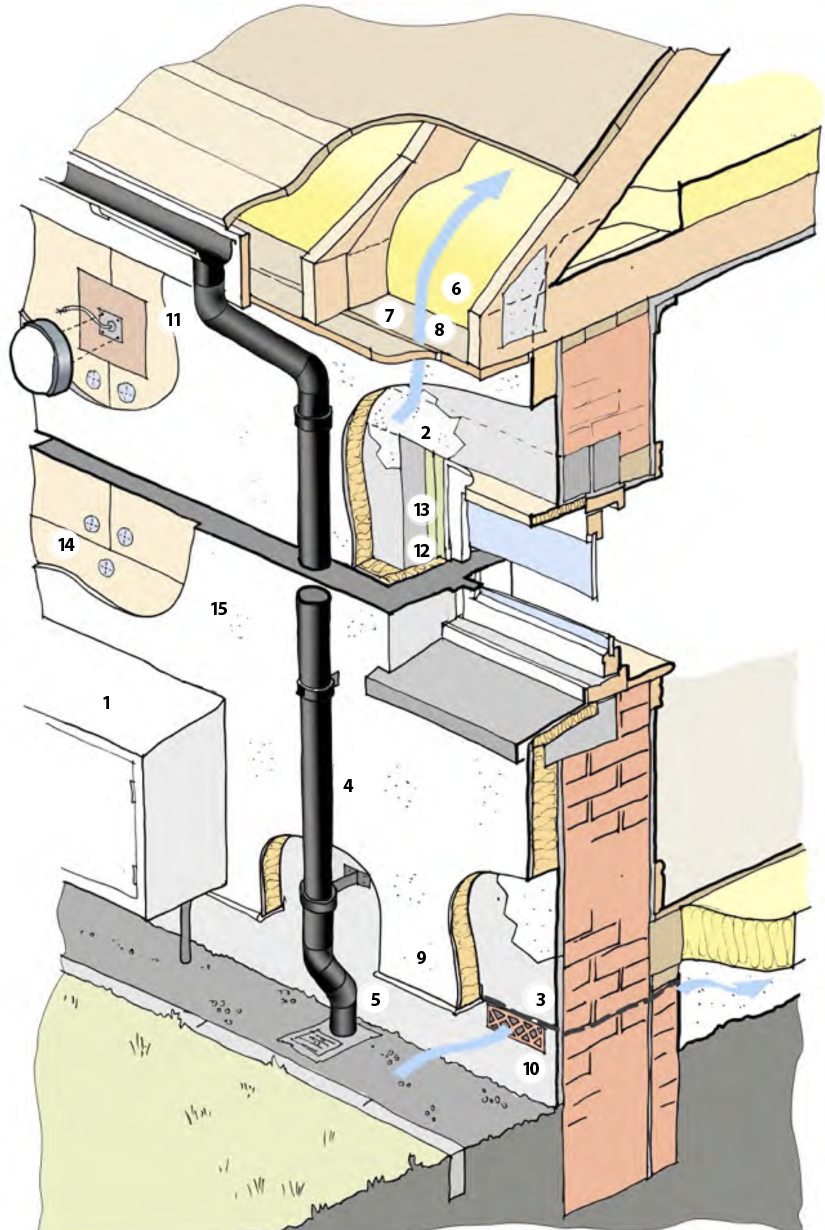
Where services must run across the surface of the building, it is best to install them within conduits to allow for future alterations. In the case of gas meters, which usually have to remain accessible and on the external face of the building, it is important to agree with the gas company to move the meter and box in advance so that it stands proud of the wall a sufficient distance to allow the insulation to run behind it. [1]
Existing structural defects
Another early item is to survey the condition of the existing face of the building. Existing structural defects will need to be rectified [2].
In some cases, it may be that the existing render or other surface is not sound. In every location where this is the case, remedial work should be undertaken to the face of the wall so that fixings made into it are securely fastened into sound and homogenous material [3].
A structural engineer’s report is sometimes required following ‘pull-out tests’ of the masonry to ensure that the wall can support the insulation and resist being sucked away by adverse wind conditions.
Downpipes and waste pipes
Downpipes [4] and waste pipes running across the facade must be moved outward, allowing insulation to run behind them. Extended fixings are available for every type of pipe. Adjustments must also be made at the top and bottom of pipes where they connect to the gutter above and drains below.
In some cases, it is possible to ‘swan-neck’ the pipework back into the existing ground connections [5]. In others, moving the existing drain connection or creating a new one is necessary.
Eaves detailing
Existing eaves details vary significantly. The key to effective insulation is to ensure that the insulation in the roof or ceiling is continuous with the insulation on the walls. [6]
Many buildings have overhanging eaves, which enable the roof insulation to cover the wallhead, and it is relatively straightforward to ensure that the two insulation layers meet. In cases like this, there is often a soffit board which must be removed to allow access to the wall-head. [7]
In older properties, the roof can be ‘tight’ to the wall, meaning there is no opportunity to join the external wall insulation, so if allowable and practical, the lower section of the roof needs to be extended to enable insulation to continue across the wall-head and join the external boards. The eaves board and gutter can be moved simultaneously, and the overall appearance remains unchanged.
It is always important to ensure a route for ventilation above the insulation, whether in a loft or within the rafters [8].
Typical practice for external insulation is to install the bottom or starting runner for the insulation approximately 50mm above the internal floor level. This means that heat leaks out of the wall's base, creating internal cold areas that attract condensation and mould. The insulation must be extended downwards, at least as far as the depth of the floor. [9]
Insulation location
In solid floored properties, it makes sense to take the insulation down to ground level and, if possible, below ground level. The insulation should be thinner and more robust to resist knocks. This insulation should be installed up to and tight to the bottom or starter rail normally used to set the main insulation boards and sealed with a non-setting sealant. This insulation must also be finished, usually with a similar render as above.
In suspended floors, the primary insulation and render should extend at least as far down as the full depth of the floor joists. Ventilation to the spaces beneath the joists must be retained (and, if missing, installed) [10].
Most properties have some features that can complicate external wall insulation. External lights [11] and signs, satellite aerials and dishes, hanging flower baskets and other items should be removed and, replaced, secured using thermally broken fixings through a patch of suitable (robust) insulation of the same depth.
Windows and doors
If windows and doors are to be replaced or repaired, it is best to undertake this before the insulation is installed so that it can be carefully fitted to and sealed against the frames. Windows should be installed close to or in line with the line of the insulation. The further back from the face of the wall, the more of a gap is created across the reveal, which needs to be insulated. Ideally, at least 20 mm of insulation should be installed to all reveals (including the cill), although specially designed thin insulation can be used if there isn’t enough room. [12] In all cases, installing airtightness tape over the join between windows and masonry is worth installing to avoid air leakage at this common weak spot. [13]
Installation
• In terms of installing the main insulation boards, there is no difference between our and conventional guidance. The main thing is to follow the manufacturer's guidance, ensuring that there are no gaps, corners around openings do not coincide with joins in boards and the correct beads are used.
Independent inspection
[14] On some projects, the more difficult-to-access areas sometimes get left, and we advise that an independent person inspects both the extent and quality of the installation of boards (particularly regarding gaps) before the first coats of render are applied.
Vapour permeability
It is important that the insulation material is vapour permeable to allow moisture within the wall to escape. Most ‘natural’ materials tend to be breathable, as do most mineral wool configurations and expanded polystyrene. Certain plastic insulants described as ‘closed cell’ are likely to be impervious to moisture, and these should be avoided in this situation unless there is a clear alternative strategy to remove moisture within the wall.
Insulation and fire
The Grenfell Tower tragedy has raised concerns about the behaviour of building materials in fire. In this regard, mineral wool products have a clear advantage over plastic and most natural insulation. However, when insulation is installed tight against a masonry wall and covered in a non-combustible render – as described here – the risk of fire spread is minimised because fire cannot easily 'get into' the insulation, nor once in, can it readily spread. The risk of fire spread in cases like Grenfell is linked to the adjacency of the insulation to a continuous cavity.
Render
Render is after that applied to the insulation boards and tends to be built up in two or three coats and with a variety of finishes [15]. As with the insulation, the render must be vapour-permeable and waterproof. Different thicknesses and finishes are often applied to reveals of openings, to other areas of the building (for aesthetic reasons) and to the base course if applied.
• Original features of the building, where possible, should be replaced/re-formed as far as is practical.
• Once the render is completed, several items temporarily removed should be re-connected / replaced.
Alternatives
Insulating render
Another technique, once the wall is prepared, is to install an insulating render directly onto the wall. This technique has some significant advantages, mainly that it represents fewer operations and is likely to be much cheaper, quicker and simpler to undertake. As discussed above, the modest U-value improvements are acceptable, although they may be an issue for compliance.
Health & Safety
The most common health & safety issues centre around access (working off scaffolding) and the issues raised during disconnection and reconnection of existing externally mounted services (such as gas meters).
How Much is Enough?
Unless there is a particular U-value target to be reached, around 100mm of suitable insulation is usually sufficient. In Passivhaus-standard retrofits, this will likely be thicker. What is much more important than the precise depth of the insulation is the continuity of the insulation, so, for example, it is more important to move all of the downpipes/waste pipes/gas meters / external lights than add an extra 20mm of insulation.